

Why Ceiling Fans Are a Smart Investment for Parker Homes
Ceiling fan installation Parker services can transform your home’s comfort and energy efficiency. Whether you’re looking to cool down in summer, circulate warm air in winter, or simply reduce your energy bills, a properly installed ceiling fan is a year-round solution.
Quick Answer: Finding Professional Ceiling Fan Installation in Parker
- Licensed Electricians: Look for certified professionals familiar with local Parker building codes
- Local Plumbing & Electric Companies: Many full-service contractors, like Gray Phoenix Plumbing, offer ceiling fan installation
- What to Expect: Professional installation typically takes 1-2 hours and includes safe wiring, secure mounting, and testing
- Cost: Professional installation ranges from $100-$300 depending on ceiling height and complexity
- DIY Option: Possible for those comfortable with electrical work, but requires a fan-rated electrical box and proper safety precautions
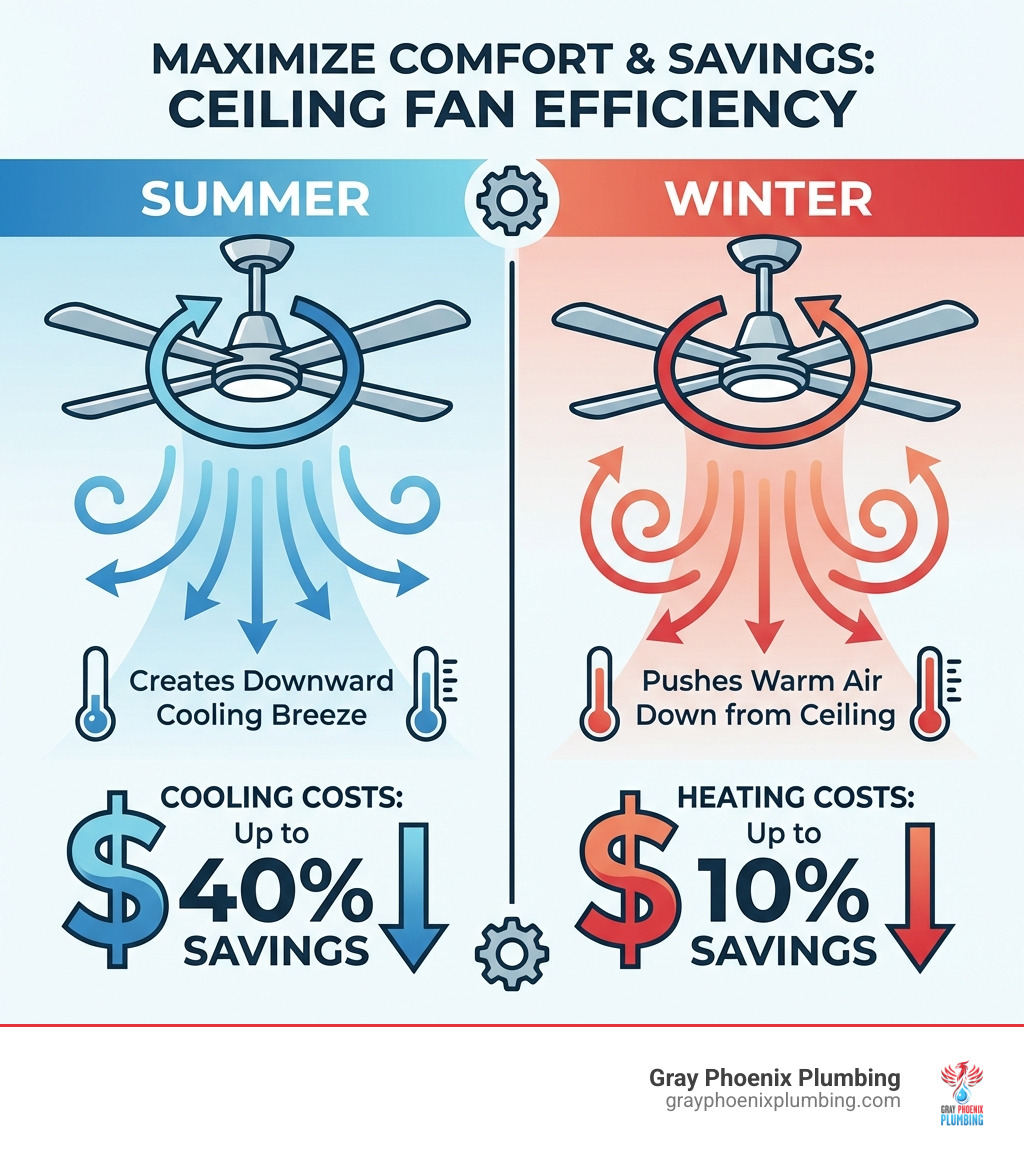
A ceiling fan helps circulate air, allowing you to adjust your thermostat and save on energy costs year-round. In summer, it creates a cooling breeze, and in winter, it pushes warm air down from the ceiling.
While installation can be a DIY project for those with electrical skills, it requires careful attention to safety. Your electrical box must be fan-rated (able to support at least 70 pounds), and you need proper clearance. Complex situations like high ceilings or outdated wiring often require professional expertise.
As Chris Hoffman, a Master Plumber with over 25 years of experience serving the Parker and Elbert County areas, I’ve helped countless homeowners with electrical installations including ceiling fan installation Parker projects that improve both comfort and home value. My team at Gray Phoenix Plumbing approaches every job with the same commitment to safety, quality workmanship, and transparent communication.
Before You Begin: Pre-Installation Checklist
Before we dive into the nitty-gritty of ceiling fan installation Parker, let’s make sure we’re fully prepared. A little planning goes a long way in ensuring a smooth and successful installation. This section covers the benefits of ceiling fans, the essential tools and materials, and how to prepare your ceiling and electrical box.

The Year-Round Benefits of a Ceiling Fan
Why bother with ceiling fan installation Parker? The answer is simple: comfort and cost savings, all year long.
- Energy Savings: A ceiling fan’s wind-chill effect allows you to raise your thermostat in the summer, leading to significant savings on cooling costs.
- Air Conditioning Support: By circulating cool air, fans reduce the strain on your HVAC system, making it more effective.
- Winter Heat Circulation: In winter, reverse the fan’s direction (clockwise) to push warm air that has risen back down into your living space. This helps your heating system work more efficiently.
- Improved Airflow: Ceiling fans prevent stuffiness by keeping air moving, making any room feel fresher.
- Room Aesthetics: Modern fans are available in countless styles and can serve as a stylish focal point that improves your home’s decor.
These benefits make ceiling fan installation Parker a smart investment for any homeowner.
Gathering Your Tools and Materials
Having the right tools on hand before you start your ceiling fan installation Parker project is crucial for safety and efficiency. Here’s what you’ll need:
- New Ceiling Fan Kit
- Stepladder or Extension Ladder
- Voltage Tester: To verify the power is off before you touch any wires.
- Screwdrivers (Phillips-head and flat-head)
- Wire Strippers
- Pliers
- Electrical Tape
- Wire Nuts: For securely connecting electrical wires.
- Drill
- Fan-Rated Electrical Box: Critical for supporting the fan’s weight and vibration (rated for at least 70 pounds). A standard light fixture box is not sufficient.
- Stud Finder
- Gloves and Safety Glasses
Understanding Mounting Options and Ceiling Prep
Proper ceiling preparation is paramount for a safe ceiling fan installation Parker. This involves checking your electrical box and understanding mounting options.
First, check the electrical box. A standard junction box for a light fixture cannot support a ceiling fan’s weight and movement. You need a fan-rated electrical box, which is marked as such and securely mounted to a ceiling joist or brace. If your box isn’t fan-rated, it must be replaced before installation. This is a common reason to call a professional to avoid safety hazards.
Next, consider mounting options:
- Flush Mount: “Hugger” fans are ideal for low ceilings (under 8 feet) as they mount directly to the ceiling.
- Downrod Mount: The most common style for standard or high ceilings. A downrod extends the fan from the ceiling to optimize airflow.
- Angled Mount: For vaulted ceilings, you’ll need an angled mount kit. Most fans accommodate angles up to 34 degrees, but steeper angles require special hardware and professional consultation.
Finally, clearance requirements are vital for safety and performance:
- Floor to Blades: Fan blades must be at least 7 feet above the floor.
- Walls to Blades: Blade tips need at least 30 inches of clearance from walls or other obstructions.
A Step-by-Step Guide to DIY Ceiling Fan Installation
Now that we’ve covered the preparations, let’s walk through the process of ceiling fan installation Parker. While this can be a rewarding DIY task, safety is always the top priority.

Safety First: Critical Precautions
Working with electricity is dangerous. Please follow these precautions carefully:
- Turn Off the Power: At the circuit breaker box, turn off the breaker for the room you’re working in. If unsure, turn off the main breaker.
- Verify Power is Off: Use a voltage tester on the ceiling wires to confirm there is no electrical current.
- Secure the Wall Switch: Tape the wall switch in the “off” position to prevent it from being turned on accidentally.
- Read the Manufacturer’s Manual: Every fan is different. Follow the specific instructions included with your model.
- Work with a Helper: A second person is invaluable for holding the fan motor during installation.
If you’re ever unsure, pause and call a professional. For more guidance on specific models, you can refer to this comprehensive guide: How to Install a Ceiling Fan.
From Box to Bracket: Assembly and Mounting
With safety measures in place, you can begin the physical installation.
- Remove the Old Fixture (if applicable): Carefully disconnect the old fixture’s wires and remove it along with its mounting bracket.
- Inspect the Electrical Box: Confirm the box is fan-rated and securely attached to a ceiling joist. If not, it must be replaced before you continue.
- Install the New Mounting Bracket: Secure the new fan’s mounting bracket to the fan-rated electrical box using the provided screws. Ensure it is tight and stable.
- Assemble the Fan: Following the manufacturer’s instructions, perform any necessary pre-assembly, such as attaching the downrod to the motor housing.
Connecting the Wires Like a Pro
This step requires careful attention to detail.
- Identify the Wires: In your ceiling, you’ll have a black (hot), white (neutral), and green or bare copper (ground) wire. Your fan will have corresponding wires, often with a blue wire for the light.
- Make the Connections: Using wire nuts, connect the wires as follows:
- Ground to Ground: Connect the green/bare copper wires from the ceiling and fan.
- Neutral to Neutral: Connect the white wire from the ceiling to the white wire from the fan.
- Hot to Hot (Fan): Connect the black wire from the ceiling to the black wire from the fan’s motor.
- Hot to Hot (Light): Connect the blue wire from the fan’s light kit to the black ceiling wire (to have them operate together) or to a separate hot wire if available for independent control. Cap any unused wires.
- Secure and Tuck: Gently tug on the wires to ensure the wire nut connections are secure. For extra security, wrap each connection with electrical tape. Neatly tuck all wires into the electrical box.
Final Assembly and Testing
You’re almost there! This is where your ceiling fan installation Parker comes together.
- Attach the Motor to the Bracket: Lift the fan motor assembly and attach it to the mounting bracket as directed by the manual. Many brackets have a hook to temporarily hang the fan during wiring.
- Install the Fan Blades: Attach the blades to the blade irons, and then attach the irons to the motor. Tighten all screws securely to prevent wobbling.
- Attach the Light Kit (if applicable): Connect the light kit’s wires and secure it to the fan. Install the bulbs (not exceeding the max wattage) and glass shades.
- Restore Power and Test: Turn the circuit breaker back on. Test all fan speeds, the light, and the reverse direction switch.
- Balance Blades (if wobbling occurs): If the fan wobbles, use the included balancing kit to fix it by following the kit’s instructions.
Congratulations! You’ve completed your ceiling fan installation Parker.
Common Issues and When to Call for Professional Ceiling Fan Installation in Parker
Even with careful DIY efforts, issues can arise during or after ceiling fan installation Parker. It’s important to know how to troubleshoot common problems and when to call in the experts.
Troubleshooting Wobbles, Hums, and Clicks
Ceiling fans should be quiet, but quirks can develop. Here’s how to address them:
- Wobbling Fan: Severe wobbling can strain the motor and mounting. Check for loose blade screws and ensure the mounting bracket is secure. If needed, use the balancing kit included with your fan.
- Humming Noises: A loud hum often points to an electrical issue. The most common cause is an incompatible dimmer switch, which should be replaced with a standard fan speed control.
- Clicking Sounds: Clicking usually means something is loose. Check all screws on the fan blades and light fixture. It can also be caused by wires rubbing against the motor housing.
For more detailed troubleshooting, we recommend this guide: 5 Common Causes of Noisy Ceiling Fans. If these fixes don’t work, it’s time to call a professional.
Red Flags: When a DIY Project Becomes a Hazard
While ceiling fan installation Parker can be a DIY project, some “red flags” mean you should call a licensed electrician immediately to avoid safety hazards like electrical fires.
- No Existing Wiring: Running new electrical circuits is a job for a licensed electrician.
- Old or Plastic Junction Box: If the box isn’t fan-rated (rated for 70+ lbs and braced to a joist), it must be replaced by a professional.
- Very High or Vaulted Ceilings: These installations can be dangerous without proper equipment and experience.
- Complex Wiring: If wiring colors are non-standard or confusing, stop and call an expert.
- Flickering Lights or Tripped Breakers: These signs point to an electrical overload or short circuit. Turn off the power and call an electrician.
- Sparks or Burning Smells: This is an emergency. Turn off power at the breaker immediately and call an electrician due to fire risk.
The Benefits of Hiring a Pro for Ceiling Fan Installation Parker
Choosing a professional service like Gray Phoenix Plumbing offers numerous advantages, especially when facing the “red flags” above.
- Safety and Code Compliance: Our licensed electricians ensure every installation is safe and compliant with local Parker codes, minimizing electrical risks.
- Proper Tools and Experience: We have the specialized tools and experience for any scenario, including high ceilings and complex wiring.
- Time Savings: A professional can typically complete an installation in 1-2 hours, saving you time and hassle.
- Guaranteed Workmanship: We stand behind our work with a Customer Care Guarantee, so you can trust the job is done right.
- Peace of Mind: Knowing a certified professional handled your electrical work provides unparalleled peace of mind.
For more information on our comprehensive residential services, please visit our page: More info about our residential services.
Frequently Asked Questions
We often get questions about ceiling fan installation Parker from homeowners. Here are some of the most common queries with our expert answers.
How much clearance does a ceiling fan need?
For safety and optimal performance, ceiling fans require specific clearances:
- From the Floor: Fan blades must be at least 7 feet from the floor to prevent accidental contact and ensure effective air circulation.
- From Walls/Obstructions: Blade tips need a minimum of 30 inches of clearance from walls or other objects to allow for unobstructed airflow and prevent wobbling.
Following these guidelines ensures your fan operates safely and efficiently.
Can I replace a light fixture with a ceiling fan myself?
Yes, but only if the existing electrical box in your ceiling is fan-rated. This is the most critical factor. A standard box for a light fixture cannot support the weight and vibration of a fan. A fan-rated box is sturdier, usually metal, and braced to a ceiling joist to support at least 70 pounds.
If your box is not fan-rated, it must be replaced, which can be a complex job. To avoid a significant safety hazard, we strongly recommend calling a professional for ceiling fan installation Parker if you are unsure or need to replace the box.
What should I look for in a professional for ceiling fan installation Parker?
When hiring for your home’s electrical work, choose wisely. Here’s what to look for:
- Licensed and Insured: Verify the company’s electricians are licensed and insured to protect you from liability. Our team at Gray Phoenix Plumbing consists of licensed, background-checked pros.
- Local Parker Experience: A local company will know Parker’s building codes. We have proudly served Parker and surrounding areas for years.
- Positive Customer Reviews: Check online reviews for a track record of reliability and quality customer service.
- Transparent Pricing: A good company offers clear, upfront pricing. We believe in transparency with no hidden fees.
- Service Guarantees: A reputable company will guarantee their work. We offer a Customer Care Guarantee on all our services.
Choosing the right professional ensures a safe, efficient, and hassle-free ceiling fan installation Parker.
Your Parker Partner for Home Comfort and Safety
We’ve explored the benefits, process, and safety considerations for ceiling fan installation Parker. A properly installed ceiling fan is a fantastic addition to any Parker home, helping you stay comfortable year-round while enhancing your home’s aesthetic.
While this guide can help the DIY enthusiast, we must emphasize that electrical work can be dangerous if done incorrectly. The peace of mind that comes from knowing a licensed professional handled the job is unparalleled.
At Gray Phoenix Plumbing, we’re your one-stop shop for residential electrical services, including expert ceiling fan installation Parker. Our family-owned business provides reliable, transparent, and high-quality services to our neighbors in Parker, Elizabeth, Castle Rock, and throughout the Denver metro area. Our licensed and background-checked pros are dedicated to ensuring your home is comfortable, safe, and efficient.
Whether you’re ready to tackle the project yourself or prefer the assurance of professional expertise, we’re here to help. If you have any questions, encounter a challenge, or simply want the job done right by trusted local experts, don’t hesitate to reach out.
For expert home services in the Parker area, trust our team to get the job done right.
Contact us today to discuss your ceiling fan installation needs or any other home service requirements. We look forward to serving you and helping you improve the comfort and safety of your Parker home!


