

Why Fixture and Faucet Repair Matters to Your Home and Wallet
Fixture and faucet repair is a common plumbing issue, and knowing your options can save you money and water. Most problems, from drips to wobbly handles, fall into three categories:
Your Repair Options:
- Simple DIY Fix – Replace worn washers, O-rings, or cartridges.
- Secure and Reseal – Tighten mounting hardware and re-caulk loose fixtures.
- Professional Replacement – For corroded, outdated, or repeatedly failing fixtures.
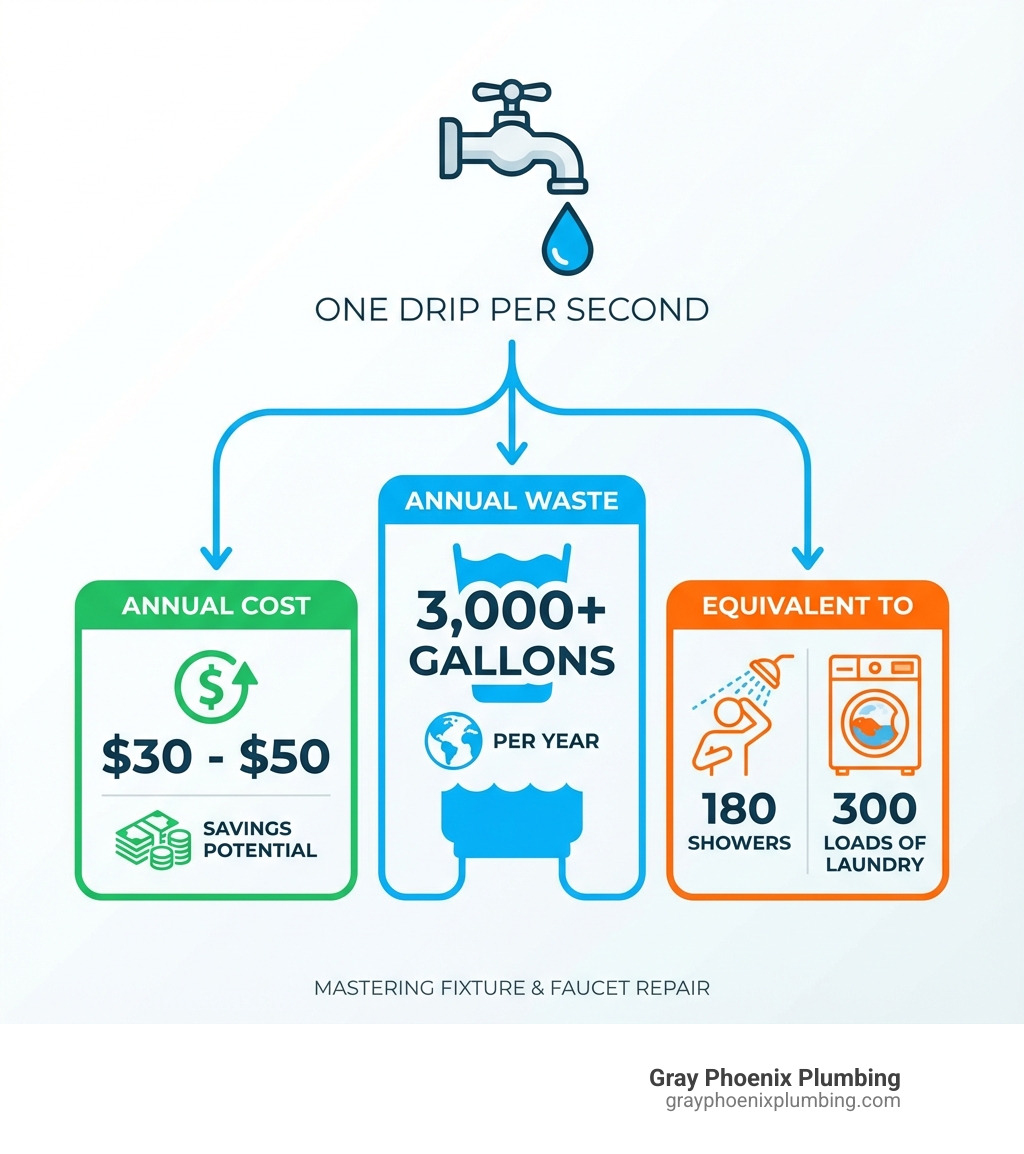
That constant drip… drip… drip isn’t just annoying—it’s money down the drain. A single leaky faucet can waste over 3,000 gallons of water per year, and fixing household leaks can cut your water bill by 10%. The good news is that many common repairs are straightforward DIY projects.
Most faucet leaks stem from worn parts like O-rings, valve seats, or cartridges. The key to a successful repair is identifying the right part for your faucet’s mechanism (cartridge, ball, ceramic disc, or compression). Sometimes, the issue is simpler: loose fixtures often just need fresh caulk or tightened hardware.
I’m Chris Hoffman, a Master Plumber with over 25 years of experience in fixture and faucet repair, and I’ve fixed thousands of leaky faucets and loose fixtures throughout the Denver Metro area. In this guide, I’ll walk you through how to diagnose common problems, decide between repair and replacement, and tackle frequent fixture issues.
Diagnosing the Problem: Leaks, Wiggles, and Wear
With fixture and faucet repair, the first step is diagnosis. Leaks and loose components are the most common culprits.
Leaky faucets are usually caused by simple, worn-out parts like washers, O-rings, or cartridges. These components create the seal to control water flow and degrade over time. A corroded valve seat can also prevent a tight seal. A pinhole leak in the faucet body is rare but signals it’s time for a replacement.
Loose fixtures, like a wobbly faucet or tub spout, are often caused by loosened mounting hardware or failed sealant. When caulk deteriorates, it creates a gap that allows movement. Fortunately, re-securing and sealing these fixtures is usually straightforward.
Identifying your faucet’s brand and model is crucial for finding the right parts. Look for a logo or model number on the faucet body, often on the spout’s underside or the base’s back.
Identifying Your Faucet Type and Parts
Knowing your faucet’s internal mechanism is key to a successful fixture and faucet repair.
- Cartridge Faucets: Common in single- and double-handle models, these use a cylindrical cartridge to control water. Though called “washer-less,” they have seals and O-rings.
- Ball Faucets: Found in single-handle kitchen faucets, these use a slotted, rotating ball to mix water. Leaks usually come from worn internal seals and springs.
- Ceramic Disc Faucets: A durable, premium option. Two ceramic discs slide to control water flow, creating a tight seal. If they leak, the entire ceramic cylinder is usually replaced.
- Compression Faucets: Older, two-handle faucets that work by compressing a rubber washer against a valve seat. If the handle rotates more than a half-turn, it’s likely a compression faucet. The washer is a common failure point.
Online tools like the Handle Selector Tool can help you identify the exact replacement part. When in doubt, take the old part to a plumbing supply store for a perfect match.
When to Repair vs. When to Replace
Deciding whether to repair or replace is a strategic decision balancing short-term cost with long-term value.
Consider Repair When:
- The problem is minor (e.g., a drip needing a new washer or O-ring).
- The fixture is relatively new and in good condition.
- It’s the first time you’ve had this problem.
- You’re on a tight budget, as repairs are generally cheaper.
Consider Replacement When:
- You’re making frequent repairs on the same fixture.
- There is visible corrosion, rust, or cracks.
- The fixture is outdated, inefficient, or performs poorly.
- A leak has caused significant water damage.
- A new, water-efficient model offers long-term savings.
Weigh the short-term cost of a fix against the long-term value and efficiency of a replacement.
Your DIY Toolkit: Gearing Up for Fixture and Faucet Repair
The right tools make fixture and faucet repair a manageable DIY project.

Here’s a list of indispensable tools for most common repairs:
- Adjustable Wrench
- Screwdriver Set (Phillips and flathead)
- Allen Keys (Hex Wrenches)
- Plumber’s Putty
- Silicone Caulk (Bathroom-Grade)
- Penetrating Oil
- Replacement Parts (O-rings, washers, etc.)
- Basin Wrench
- Utility Knife
- Flashlight
- Bucket and Towels
Essential Tools for Fixture and Faucet Repair
- Basin Wrench: This specialized wrench has a swiveling head designed to reach the mounting nuts that secure faucets in tight spaces under a sink.
- Braided Stainless Steel Supply Lines: When replacing a faucet, upgrade to these lines. They are more durable and burst-resistant than older rubber or vinyl lines.
- Silicone Caulk: For bathroom fixtures, use a high-quality, bathroom-grade silicone caulk. It’s waterproof, flexible, and mildew-resistant.
- Plumber’s Putty vs. Gaskets: Use the gasket if your new faucet includes one. Otherwise, use plumber’s putty to create a watertight seal for faucet bases or drains. It’s a non-hardening compound that remains pliable.
- Faucet Aerator Key: Many modern faucets have recessed aerators that require a special plastic key for removal.
Understanding Water Shut-Offs
Before any fixture and faucet repair, you must turn off the water supply to prevent a flood.
Locating Shut-Off Valves:
- Under-Sink Valves: Most fixtures have individual shut-off valves on the supply lines beneath them. Turn them clockwise to close.
- Main Water Shut-Off: Every home has a main valve that controls all water. It’s often near your water meter or in a utility closet. Knowing its location is crucial in an emergency.
Types of Valves:
- Gate Valves: These older, round-handled valves require multiple turns. They can corrode and fail to close fully, so we recommend turning them periodically to prevent seizing.
- Ball Valves: Newer and more reliable, these have a lever handle that requires only a quarter-turn to shut off the water.
How to Turn Off Water Supply:
- For a single fixture: Turn the hot and cold shut-off valves clockwise under the sink.
- For a major repair or emergency: Locate and turn the main water shut-off valve clockwise.
- After shutting off the water, open the faucet you’re working on to drain residual water and release pressure.
Step-by-Step Guide to Common Fixture and Faucet Repair
This section provides a practical walkthrough for the most frequent issues homeowners face.
Fixing a Leaky Faucet: Single and Double-Handle Models
Most leaks stem from worn internal components. Here’s how to approach these common fixture and faucet repair tasks.
1. Disassembling a Single-Handle Faucet:
- Turn off the water supply under the sink and cover the drain.
- Remove the decorative cap or set screw on the handle and lift the handle off.
- Unscrew the dome cap under the handle to expose the cartridge. Carefully remove any retaining clips.
- Pull the cartridge straight out (use pliers if needed), noting its orientation for reassembly.
2. Disassembling a Double-Handle Faucet:
- Turn off the water supply and cover the drain.
- Remove the handles, which are typically held by caps or screws.
- Use an adjustable wrench to unscrew the packing nut that secures the stem.
- Lift out the stem assembly (either a compression stem or a cartridge).
3. Replacing a Cartridge:
- Take the old cartridge to a supply store for an exact match.
- Insert the new one, ensuring correct orientation, and reassemble the faucet.
4. Replacing O-rings (for spout base leaks):
- For leaks at the spout base, the O-rings need replacing. After removing the handle, lift the spout to access them.
- Use a pick to remove the old O-rings, coat the new ones in plumber’s grease, and roll them into place before reassembling.
5. Cleaning or Replacing the Aerator:
- To fix low flow, clean the aerator. Unscrew it from the spout (use pliers with a cloth to prevent scratches).
- Disassemble and rinse the parts. Soak in vinegar to remove mineral buildup. If cleaning doesn’t work, replace it.
Tips for Fixing Leaks:
- Keep a bucket and towels handy.
- Take photos during disassembly to aid reassembly.
- Turn the water back on slowly to avoid damaging new parts.
- After reassembly, run water for a minute with the aerator off to flush debris.
Securing Loose Fixtures: Faucets, Spouts, and Escutcheons
A wobbly fixture can allow water to seep behind walls or under sinks, leading to costly damage.
Common Causes of Loose Fixtures:
- Loosened mounting nuts from daily use and vibrations.
- Deteriorated caulk or sealant creating a gap.
- Missing set screws on fixtures like tub spouts.
1. Tightening Mounting Nuts (for wobbly faucets):
- Clear the area under the sink and turn off the water.
- Locate the mounting nuts securing the faucet.
- Use a basin wrench to tighten them clockwise until snug. Do not overtighten, as this can crack the sink. For rusted nuts, use penetrating oil.
- Check that the faucet is stable.
2. How to Fix a Loose Tub Spout:
- Check for a set screw on the underside of the spout near the wall and tighten it.
- If there’s no screw, the spout is threaded; twist it clockwise to tighten.
- Finish by applying a bead of bathroom-grade silicone caulk where the spout meets the wall.
3. How to Re-Caulk a Faucet Escutcheon or Faucet Base:
- Completely remove old caulk using a utility knife and clean the area with rubbing alcohol.
- Apply a smooth bead of bathroom-grade silicone caulk around the base.
- Smooth the bead with a wet finger or caulk tool and let it cure for 24 hours before water exposure.
4. How to Properly Seal a New Faucet Base to the Sink:
- If your new faucet has a gasket, use it. If not, apply a rope of plumber’s putty to the underside of the faucet base before setting it.
- After tightening the mounting nuts, clean away any excess putty that squeezes out.
Beyond the Drip: Handling Major Plumbing Issues
Some plumbing problems require immediate action to prevent significant water damage.
Frozen and Burst Pipe Emergencies
In Colorado’s climate, frozen pipes are a serious winter concern. They can interrupt water service and lead to burst pipes, causing extensive damage.
Signs of a Frozen Pipe:
- No water from a faucet.
- A noticeable drop in water pressure.
- Frost on exposed pipes.
How to Prevent Frozen Pipes:
- Insulate pipes in unheated areas like garages and crawl spaces.
- Disconnect garden hoses and shut off outdoor faucets.
- Keep your thermostat at 55°F or higher.
- Open cabinet doors under sinks to let warm air circulate.
- During extreme cold, let a faucet drip slowly to relieve pressure.
- Know the location of your main water shut-off valve.
Safely Thawing Frozen Pipes:
- Open the faucet connected to the frozen pipe.
- Apply gentle heat with a hairdryer, heating pad, or hot towels. Start near the faucet and work your way back.
- NEVER use an open flame; it’s a fire hazard and can damage pipes.
- If the pipe won’t thaw or you suspect it has burst, call a professional immediately.
Signs of a Burst Pipe:
- A sudden, significant drop in water pressure.
- Visible water leaks or pooling.
- The sound of running water behind walls.
- Water stains on walls or ceilings.
Emergency Shut-Down Procedure for a Burst Pipe:
- Turn off the main water supply IMMEDIATELY.
- Open all faucets (hot and cold) to drain the pipes.
- Call a plumber. Contact us right away for safe and professional repairs.
Advanced Home Protection
Preventing water damage is cheaper than repairing it. Modern technology offers powerful solutions beyond traditional fixture and faucet repair.
- Smart Water Monitors: Devices like Flo by Moen install on your main water line. They track pressure and flow, detecting leaks from a small drip to a major burst, and can automatically shut off your water to prevent damage.
- Flood Stop Systems: These systems protect specific appliances like washing machines or water heaters. If a leak is detected on the floor, they automatically shut off water to that appliance and sound an alarm.
- Water Alarms: These are simple, low-cost, battery-operated devices. Place them near water heaters or under sinks. They sound a loud alarm when they detect water, providing an early warning.
Frequently Asked Questions about Fixture and Faucet Repair
Here are answers to some of the most common inquiries we receive about fixture and faucet repair.
How do I know if I need a plumber for a loose fixture?
If tightening the mounting hardware doesn’t fix a loose fixture, or if you see signs of water damage like soft or crumbling material around it, call a professional. This can indicate a larger structural issue that needs expert assessment and repair.
What’s the difference between installing a kitchen faucet and a bathroom faucet?
Both installations involve connecting supply lines and securing the faucet. However, kitchen faucets often have added complexities like sprayer hoses and working around garbage disposals. Bathroom faucets typically require connecting a pop-up drain assembly. The How to Install a Kitchen Faucet guide details some of these differences.
How can I properly seal a new faucet base to the sink?
Use the gasket if your new faucet includes one. If not, apply a thin rope of plumber’s putty around the underside of the faucet’s base before setting it. After tightening the faucet from below, clean off any excess putty that squeezes out for a clean, watertight seal.
Your Partner in Plumbing Health
Mastering basic fixture and faucet repair can save you money, prevent water waste, and give you a sense of accomplishment. While many issues like drips or loose handles are great DIY projects, some jobs are best left to professionals. Attempting complex repairs beyond your skill level can lead to more damage and higher costs.
For complex repairs, new installations, or when you want the peace of mind that the job is done right by licensed, background-checked pros, our team at Gray Phoenix Plumbing is here to help. We offer reliable residential plumbing services throughout Elizabeth, CO, and the surrounding Denver Metro areas. Contact our experts for all your residential plumbing needs. We’re always ready to ensure your home’s plumbing is in top shape.


