

Why Service Valves Are the Most Important Part of Your Tankless Water Heater Setup
A tankless water heater service valve installation involves connecting special isolation valves between your unit and your home’s plumbing. These valves are essential for maintenance, allowing you to flush and descale the system without shutting off water to your entire house.
Here’s a quick overview:
- Why they matter: Service valves enable annual flushing, which boosts efficiency and can help your heater last 20 years or more.
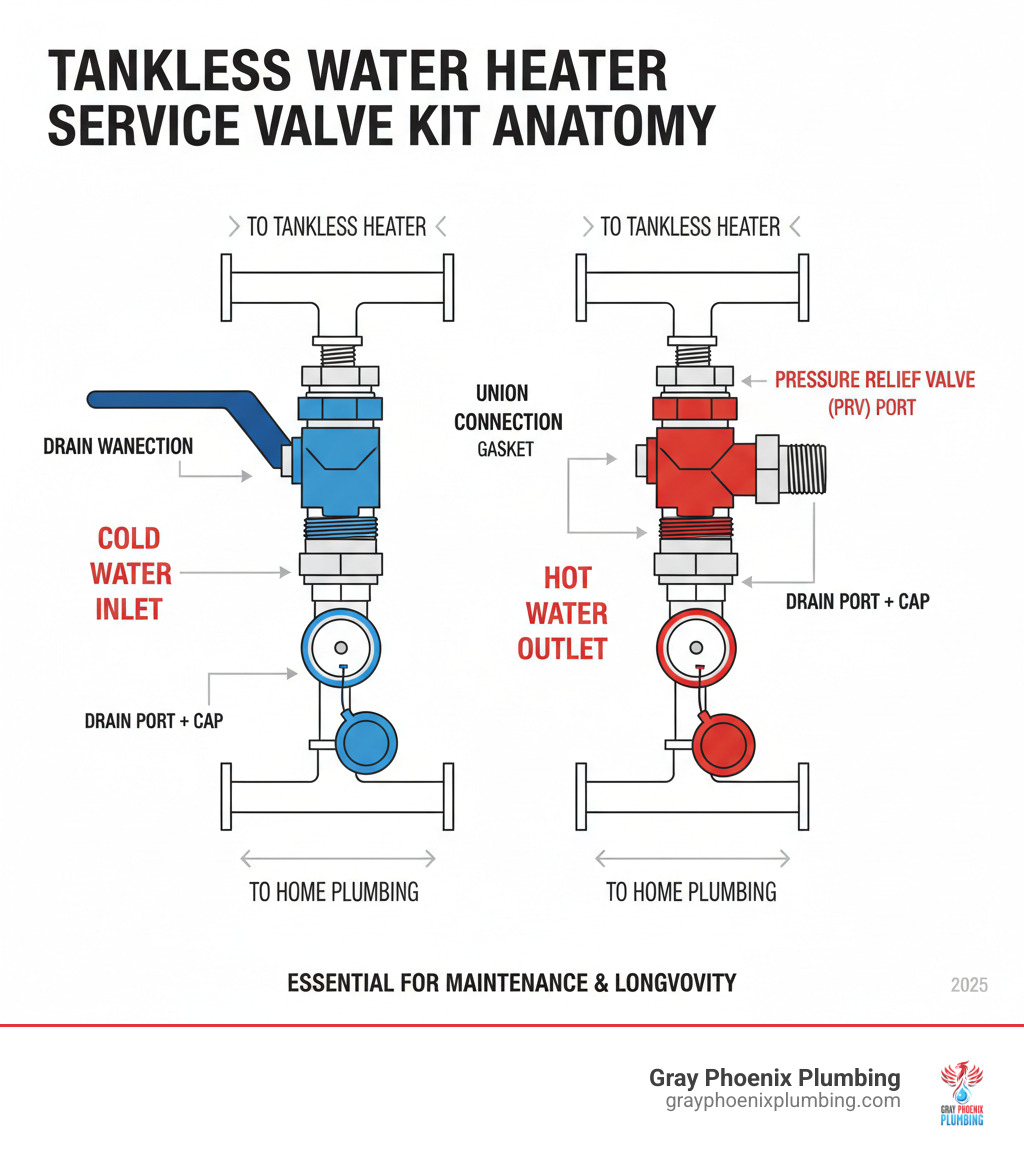
- What’s in the kit: A typical kit includes color-coded hot and cold isolation valves, union connections, drain ports, and a pressure relief valve (PRV) port.
- Connection types: Your existing plumbing will determine if you need threaded (FNPT), copper sweat, PEX, or push-to-connect fittings.
- Time required: A DIY installation takes 2-4 hours, while a professional can do it in 1-2 hours.
- Key safety step: Always shut off power, gas, and water before you begin.
Tankless water heaters are up to 24% more energy-efficient than tank models (according to the U.S. Department of Energy), but they require regular maintenance to reach their full lifespan. Without service valves, flushing out mineral buildup is nearly impossible, leading to clogs, inefficiency, and premature failure. These valves allow you to isolate the heater, connect hoses to the drain ports, and circulate a descaling solution to remove harmful sediment from the heat exchanger.
In areas with hard water, this simple task can double your heater’s lifespan. Service valves also simplify repairs and winterization, protecting your investment. As the owner of Gray Phoenix Plumbing, I’ve seen how a proper tankless water heater service valve installation is one of the smartest upgrades a homeowner can make.
Similar topics to tankless water heater service valve installation:
- cost to install an electric tankless water heater
- hot water heater contractor
- hybrid water heater installation
Preparing for Installation: Tools, Parts, and Safety Checks
Before starting your tankless water heater service valve installation, gathering the right parts and tools is essential for a smooth, leak-free job. A little preparation now prevents major headaches later.
Choosing the Right Kit for Your Tankless Water Heater Service Valve Installation
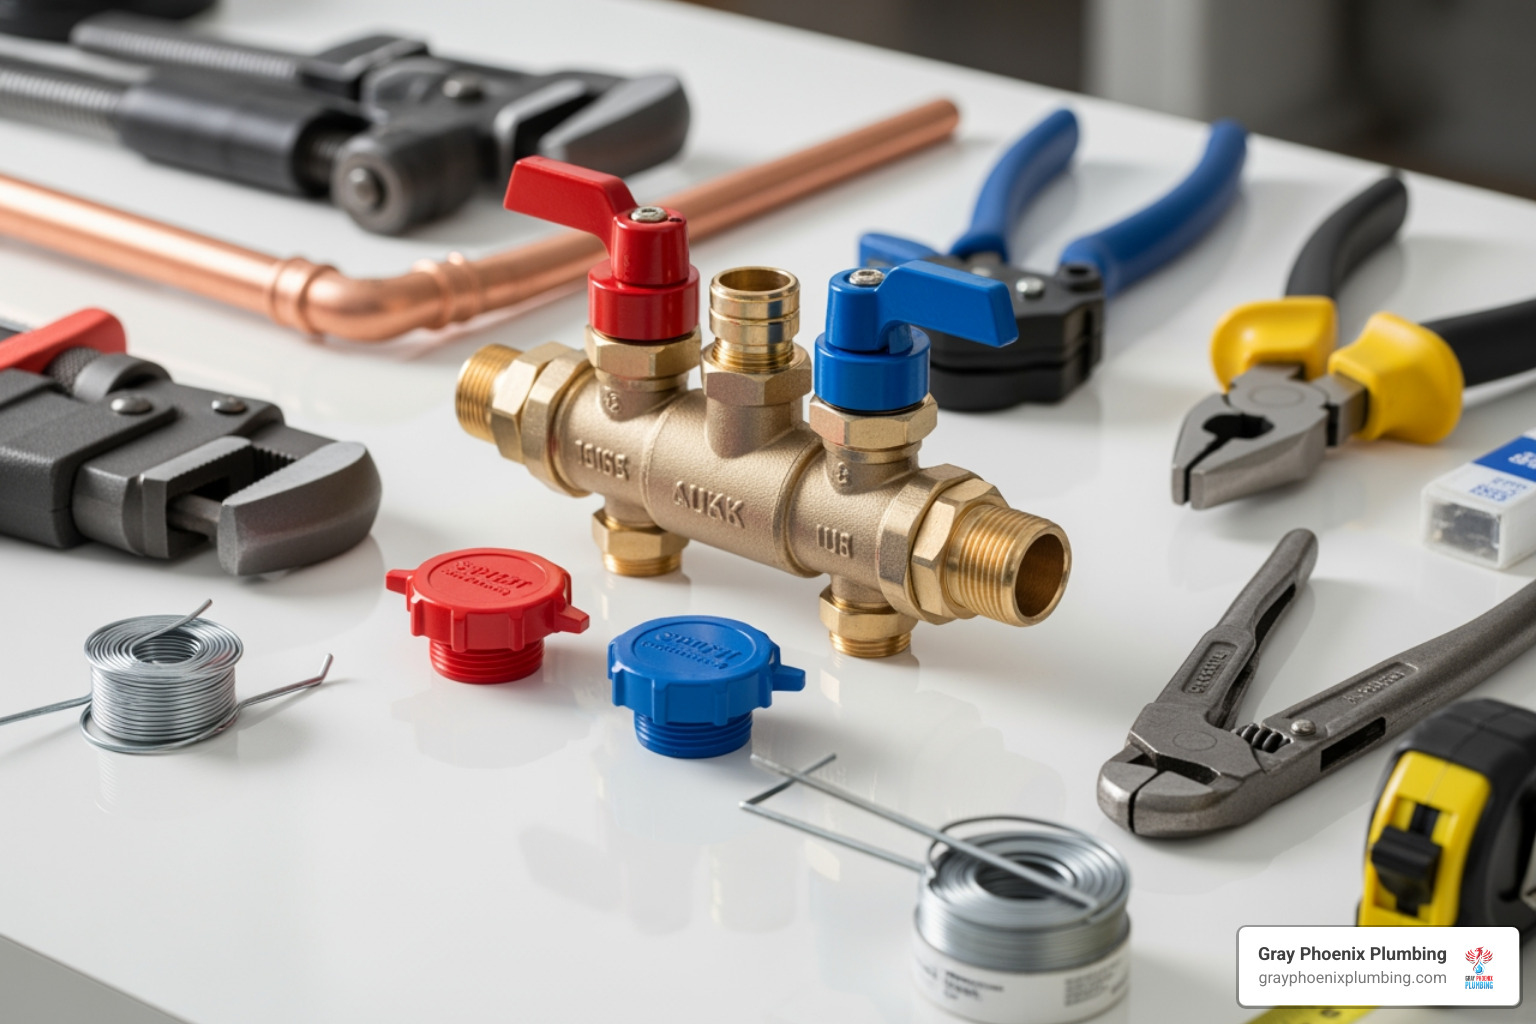
A quality service valve kit is purpose-built for tankless heaters. Key components include:
- Full-Port Ball Valves: A red-handled valve for the hot water outlet and a blue-handled one for the cold water inlet ensure maximum flow and a positive shut-off.
- Union Connections: These allow you to disconnect the heater from your plumbing without cutting pipes, simplifying future service.
- Integral Drain Valves: Capped, hose-threaded ports for attaching flushing hoses.
- Durable Brass Construction: Resists corrosion for long-term reliability.
- Pressure Relief Valve (PRV) Port: A dedicated port on the hot water valve for this critical safety device.
Your home’s plumbing dictates the connection type you’ll need. Push-to-connect fittings are popular for DIY projects in areas like Denver and Aurora, but require careful pipe prep for a reliable seal.
| Connection Type | Ease of Installation | Required Tools | Durability |
|---|---|---|---|
| FNPT (Threaded) | Medium | Pipe wrenches, PTFE tape | Very high |
| Copper Sweat | High (requires skill) | Torch, solder, flux, tube cutter, deburring tool | Very high |
| PEX | Easy | PEX crimper/clamp tool or cold-expansion tool | High |
| Push-to-Connect | Very Easy | Tube cutter, deburring tool, disconnect clip (for removal) | High (ensure proper pipe prep and insertion depth) |
Essential Tools and Materials
Gather these items before you begin:
- Wrenches: Two pipe wrenches and an adjustable wrench.
- Pipe Tools: A tube cutter and deburring tool for clean cuts.
- Sealants/Connectors: PTFE thread sealant tape for threaded fittings; solder and flux for copper; or a PEX tool for PEX connections.
- Safety & Cleanup: Safety glasses, work gloves, a bucket, and towels.
Pre-Installation Safety and Code Checks
Safety is non-negotiable. Follow these steps precisely:
- Shut Off Utilities: Turn off the main water supply valve, the gas shutoff valve to the heater, and the electrical circuit breaker for the unit.
- Relieve Pressure: Open a hot water faucet elsewhere in the house to drain residual water from the lines.
Next, check your local plumbing codes, as requirements can vary between locations like Elizabeth, Parker, and Castle Rock. Pay special attention to pressure relief valve (PRV) discharge requirements, which are based on safety standards like IPC code 504.6. The discharge pipe must:
- Be made of a material rated for at least 180°F.
- Maintain its full diameter (usually 3/4 inch) with no restrictions.
- Pitch downward to a visible drain (like a floor drain).
- Have a six-inch air gap above the drain to prevent backflow.
- Have an unthreaded end so nothing can be attached.
Improper PRV installation is a serious safety hazard. When in doubt, professional installation from licensed plumbers ensures everything is done to code.
Your Step-by-Step Guide to Tankless Water Heater Service Valve Installation
With your prep work done, it’s time to begin the tankless water heater service valve installation.
Step 1: Shut Down and Prepare the System
As covered in the safety check, ensure all utilities (power, gas, water) are off and system pressure is relieved. Then:
- Cut Pipes: Use a tube cutter for clean, square cuts on the cold inlet and hot outlet pipes.
- Deburr and Clean: Smooth the inside and outside edges of the cut pipes with a deburring tool. Clean ends are crucial for preventing leaks.
Step 2: Connect the Service Valves
Your kit contains a cold (blue) and hot (red) valve assembly.
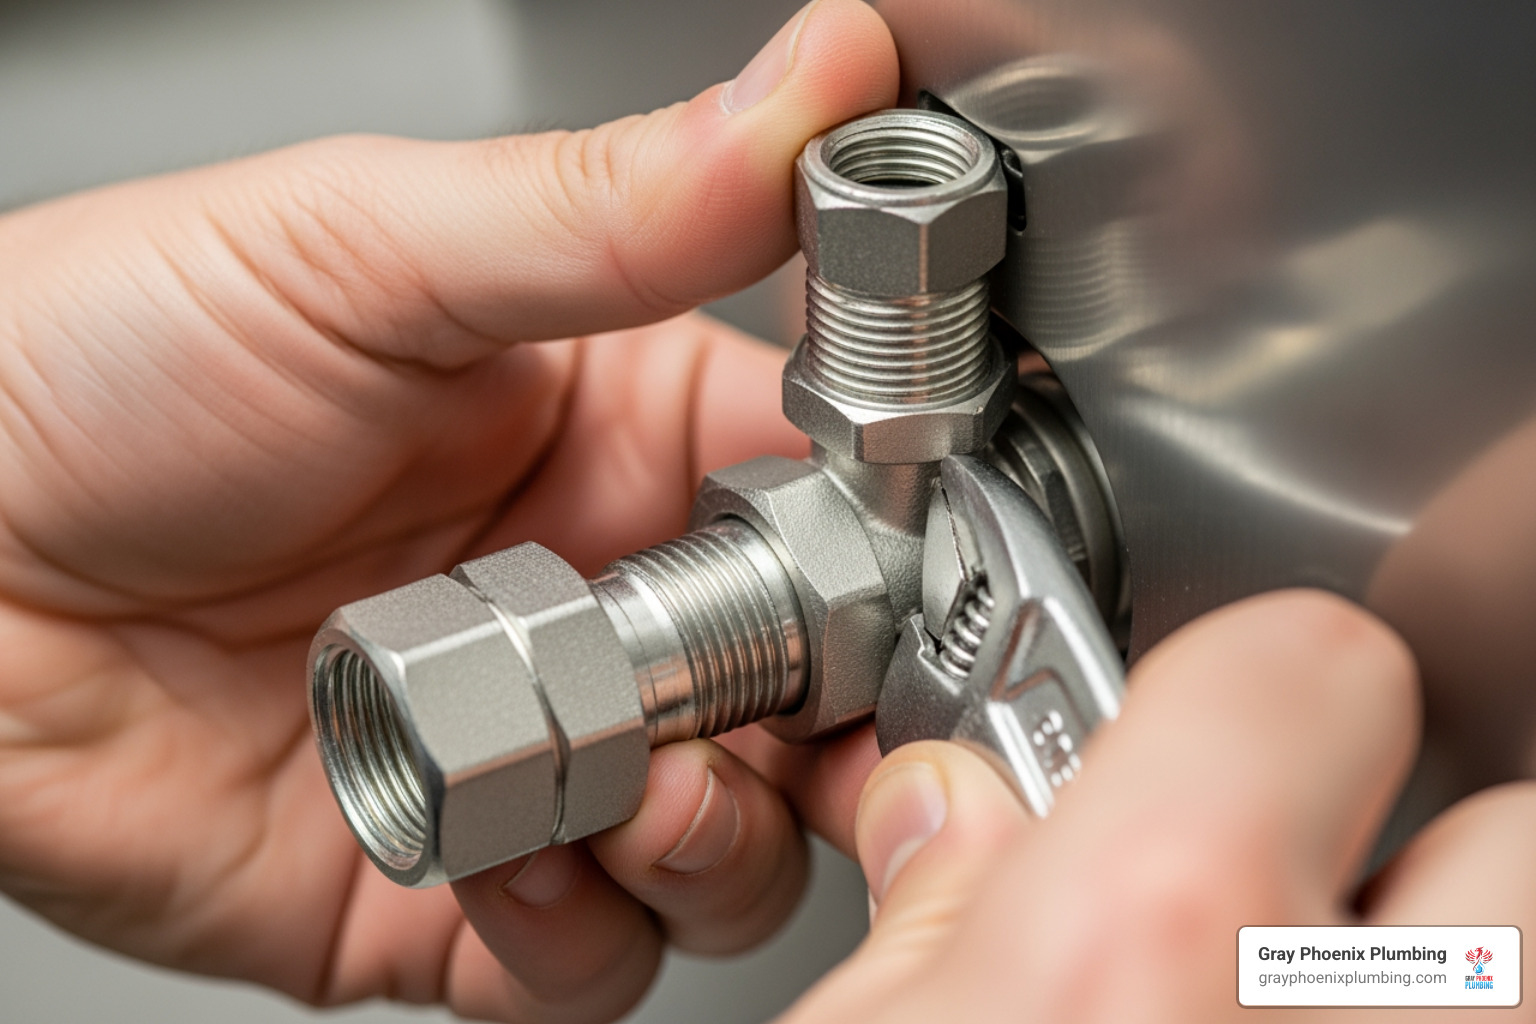
- Attach to Heater: Disassemble the union on each valve. Apply PTFE tape to the heater’s threaded water ports and attach the union tailpieces.
- Connect to Plumbing: Connect the other end of each valve assembly to your home’s corresponding water lines (cold supply to the blue valve, hot supply to the red valve). Use the appropriate method for your connection type (threaded, sweat, PEX, or push-to-connect).
- Reassemble Unions: Position the valves so the handles are accessible. Ensure the rubber gasket is properly seated inside the union, then carefully align and hand-tighten the union nut. Finish with a wrench, but do not overtighten (approx. 15 ft-lbs is a common spec), as this can damage the gasket.
Step 3: Install the Pressure Relief Valve (PRV)
The PRV is a critical safety device that prevents dangerous pressure buildup.
- Install the PRV: Apply PTFE tape to the PRV’s threads and screw it into the dedicated port on the hot water service valve. Tighten using the wrench flats on the PRV body.
- Install the Discharge Line: Connect a discharge pipe to the PRV, following all local code requirements as discussed in the preparation section (downward pitch, air gap, unthreaded end, etc.). This step is vital for safety. For more on system maintenance, see our guide to Water Heaters and Filtration Systems.
Step 4: Test for Leaks and Restore Service
This is the final check before you’re done.
- Close Drain Ports: Ensure the small drain valves on both service valves are fully closed and their caps are tight.
- Turn on Water: Slowly open your home’s main water supply valve.
- Inspect for Leaks: Carefully check every connection you made for any drips. If you find a leak, shut the water off and correct the connection.
- Restore Power and Gas: Once you’re certain there are no leaks, turn the gas supply back on and flip the circuit breaker for the heater.
- Test Hot Water: Open a hot water faucet to purge air from the lines. You’ll hear some sputtering at first; let it run until the flow is steady.
Congratulations! Your tankless water heater service valve installation is complete.
Post-Installation: Operation, Maintenance, and Troubleshooting
Your tankless water heater service valve installation is done, but the real benefit comes from using them for regular maintenance. Heres how to operate your new valves and keep your system in top shape.
How to Use Your New Valves for Flushing and Descaling
Regular flushing removes mineral buildup (limescale) from the heat exchanger, preserving efficiency and extending the heater’s life. During normal operation, the main valve handles are parallel (open) to the pipes, and the small drain valve handles are perpendicular (closed).
To perform maintenance, follow these steps:
- Isolate the Unit: Turn off the power and gas to the heater. Close the main hot and cold service valve handles (turn them perpendicular to the pipes).
- Connect Hoses: Attach one hose from the cold drain port to a small circulating pump. Run a second hose from the hot drain port into a 5-gallon bucket.
- Prepare for Draining: Open both small drain valve handles (turn them parallel to the ports) to allow flow.
- Circulate Descaler: Place the pump in the bucket with 3-5 gallons of descaling solution (food-grade white vinegar is common). Place the end of the hot water hose into the bucket to create a closed loop. Turn on the pump and circulate the solution for 30-45 minutes. This process dissolves mineral buildup. For more details, Noritz offers helpful insights on descaling that apply to most tankless systems.
- Flush the System: Turn off the pump. Close the cold drain valve and remove the pump hose. Open the main cold water valve to flush fresh water through the heater and out the hot water drain hose. Flush with at least 20 gallons of water.
- Return to Service: Close the main cold water valve, then close the hot water drain valve and remove its hose. Replace both drain caps. Open both main hot and cold valves fully, then restore power and gas.
Flush annually in most cases, or every six months in areas with very hard water, like many parts of Colorado. For more on system health, see our guide on Water Heaters and Filtration Systems.
Long-Term Inspection and Maintenance Schedule
Once a year (during your flush), perform these checks:
- Inspect Connections: Look for any drips, corrosion, or rust on the valves and fittings.
- Test Valve Handles: Ensure all handles turn smoothly. Stiffness can indicate internal corrosion.
- Test the PRV: Briefly lift the test lever on the pressure relief valve. A short burst of hot water confirms it’s not seized.
If you notice stiff handles, persistent drips, or significant corrosion, the valve may be failing. It’s best to get a professional assessment. Our team at Gray Phoenix Plumbing can help with everything from routine maintenance to repairs. Learn more about our Hot Water Heater Contractor services.
Troubleshooting a New Tankless Water Heater Service Valve Installation
Encountering a minor issue after installation is common. Heres how to handle them:
- Minor Drips: For a slow drip at a union, try a gentle quarter-turn with a wrench. For threaded connections, you may need to shut off the water, disassemble, and re-apply PTFE tape.
- Air in Lines: Sputtering faucets are caused by trapped air. Open all hot water faucets in your home and let them run until the flow is steady.
- Low Water Flow: First, ensure both main service valve handles are fully open. If flow is still low, check and clean the small inlet filter screen on your tankless unit, as debris can get lodged there during installation.
Frequently Asked Questions about Service Valve Installation
Homeowners often ask about tankless water heater service valve installation. Here are answers to the most common questions.
What are the biggest risks of improper installation?
An improper installation can be dangerous and costly. The primary risks include:
- Water Leaks: A poorly sealed connection can cause slow leaks leading to mold and rot, or a major flood causing catastrophic property damage.
- Gas Leaks: For gas units, incorrect connections are a fire and explosion hazard. Gas work requires absolute precision.
- Carbon Monoxide: Improper installation can interfere with the unit’s venting, creating a risk of deadly carbon monoxide poisoning.
- Voided Warranty: Most manufacturers will void the warranty if the unit is not installed according to their specifications.
- Code Violations: Failing to meet local codes in areas like Castle Rock or Golden can lead to fines and problems when selling your home.
Can I reuse old valves on a new tankless water heater?
We strongly advise against it. Old valves may be worn, corroded, or lack the features needed for a tankless heater. Modern service valve kits are specifically designed with:
- Integrated drain ports for easy flushing.
- A dedicated PRV port for safety.
- Union connections for simple servicing.
Using a new, purpose-built kit is a small investment that ensures reliability and protects your new water heater.
How long does a tankless water heater service valve installation take?
The timeline depends on several factors, but here are general estimates:
- DIYer: A prepared DIYer with some plumbing experience can typically complete the job in 2-4 hours.
- Professional: A licensed plumber from a team like Gray Phoenix Plumbing can usually finish in 1-2 hours.
Factors like pipe accessibility and connection type (e.g., sweat vs. push-to-connect) will affect the total time. Rushing the job can lead to leaks, so it’s better to take your time or call a professional. Learn more about our Water Heater Replacement services if you’d like an expert to handle the installation.
Conclusion: When to Call a Professional
We’ve covered the entire process of tankless water heater service valve installation, from why they’re essential to how to use them for maintenance. These valves are the key to a long, efficient life for your tankless water heater.
While a DIY installation can be rewarding, plumbing work demands precision. A small mistake can lead to significant water damage, dangerous gas leaks, or a voided manufacturer warranty. Furthermore, ensuring compliance with local codes in communities from Elizabeth to Denver can be complex.
This is where professional expertise provides peace of mind. At Gray Phoenix Plumbing, our licensed and background-checked technicians have installed countless service valves across the Denver metro area. We know the local codes, arrive with the right tools, and guarantee our work is done safely and correctly the first time.
Our team can complete the job in just a couple of hours, protecting your home and your investment with transparent pricing and our Customer Care Guarantee. If you’re unsure about any step or simply want the job done right, we’re here to help. Learn more about our professional Water Heater Replacement services and let us ensure your hot water system runs safely and efficiently for years to come.


